Monday, December 26, 2011

"Papertrey December Blog Hop Challenge"

Hello again!

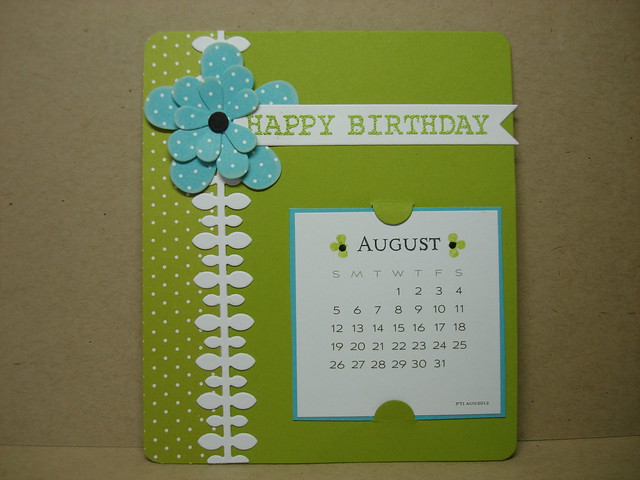
I LOVE this blog hop!  I look forward to it all month long.  So many talented paper crafters, using so many great techniques and products is a great inspiration to me.  To see what I am talking about, please click HERE.  The challenge is to make a project from scraps leftover from all of the Christmas stuff.  I was also inspired to use the color block technique demonstrated by Maile Belles HERE.  While Maile used a die to cut out her color blocked design, I used an Angled Labels die to cut out the window for my sentiment.  This project became a gift-card for my daughters birthday:

Wesley's birthday 2011

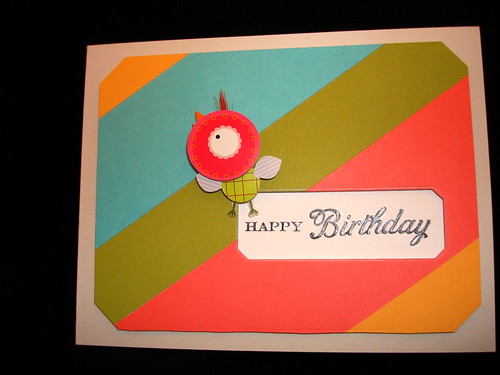
Other products used:  PTI card stocks, Summer Sunrise, Hawaiian Shores, Simply Chartreuse, Hibiscus Burst, Soft Stone, White.  
Happy Day stamp set (PTI)
Recollections dimensional stickers
Tonic corner punch
Sakura Glaze Pen

The cute little birdie embellishment is compliments of my son who gave me a package full of delightful embellishments for Christmas!  Great gift, by the way!  The interior of the card explains the gift:

Wesley's birthday 2011

I hope you are participating in the blog hop and will leave a comment here so that I can see more of your projects as well.

Thanks for stopping by,
Suzanne

All About Jonah

Hi Friends!
I hope you have enjoyed a wonderful Christmas celebration with your family and friends.  We are enjoying some sweet time with our son from Colorado, a little extra time with our grandson as my daughter and son-in-law celebrate her birthday going to an afternoon movie.  Heck!  I even had a massage this morning after my workout at the gym.  Life is good!
I thought I would take advantage of this break in the action to share with you a project that I did back in November for a precious friend whose first grandchild is soon to be born.

DSC03241

Papertrey Ink products:  Sweet Baby Die, Block Alphabet dies, Hanging Out stamp set, Vintage Cream card stock
Patterned paper:  Lil' Man, by Cosmo Cricket
Ink:  Spiced Marmalade Distress Ink, Antique Linen Distress Ink

DSC03246

DSC03245

Papertrey Ink Products:  White card stock, twine, Tag Sale #1 die, Fresh Alphabet stamp set, "To" and "From" (I don't remember which set)
Ink:  Memento Bamboo Leaves
Vine and Monkey from Hero Arts CL155
Copic Markers


I'm sorry that I did not get a picture of the packaging. I used a small kraft bag to hold the gift tags with the giraffe die cut used as a tag.  It was really cute!  These monkey tags are a gift idea from my daughter.  When her son was born, she received a set of adorable little tags with his name on them and it was one of her favorite gifts.  She said, "there is just something special about seeing your child's name in print!".  So, I often make these gift tags for the little one to use for future birthday party gift giving.  The surprise for me was that upon arriving at the shower, I learned that the nursery colors are green and brown with a monkey theme!  How cool is that?

I would appreciate any comments you might have!

Thanks for stopping by!
Suzanne

Thursday, December 22, 2011

Make It Monday #46: Any Die Into a Folded Tag

What a timely inspiration from Erin Lincoln!  If you would like to watch the video tutorial and/or play along, click HERE.  I have made a lot of tags this season, but I never get tired of them!  Tags are so much fun, don't you think?  Anyway, here are my two quick and easy folded tags:

photo

In the tutorial, Erin cut a separate piece to cover the folded part, but I just made the "joy tag" from Tag-Sale #5 from a folded piece of paper from Sugar Plum Collection, cut a standard circle from Fine Linen card stock and a scalloped circle from Plum Pudding card stock using Spellbinders, stamped the circle with a snowflake from Background Basics:Christmas, and "Joy" from Believe, and topped it with a Plum Pudding Ribbon.

photo
I followed the instructions more closely for this tag, using a second die cut to cover the white folded tag underneath.  Products for this one include: Pure Poppy card stock, Fillable Frames Die, Fillable Frames Stamp set, Holly Jolly Die, Holly Jolly Stamp set, Baker's twine,  (all from Papertrey Ink)  Versamark Ink, White Embossing Powder, Clear Embossing Powder, Peeled Paint Distress Ink.

This is the tag I want on my gifts! 

I hope you are ready to settle down and enjoy the last few days of the holiday with your family and friends.  Shall we make New Year's Resolutions regarding all of the things we PLANNED to do THIS season?  I have a list and I would bet you do too!  I would love to hear some comments from you!

Thanks for stopping by!
Suzanne

Merry Christmas!!!

2012 Calendar Project

Hi There!
 
I've missed visiting with you but I expect that you have been as busy as I have been.  As of a few minutes ago, I have put away all of the "Christmas" stamp sets and supplies.  With them I put a list of the things I wish I could have done this year-I plan to start in August for next Christmas.    The packages are wrapped and under the tree.  The third batch of homemade rolls and the cinnamon rolls will be made tomorrow.  We are so excited about Christmas morning with our two year old grandson.  I am ready to sit back and enjoy the view!

But, for now, I want to share with you a project that gave me great pleasure to create.  I know that practically no one uses a desk calendar anymore, but, I like the idea of giving a little beauty that lets the receiver know that she is important to me and that I think of her everyday.  So here is the calendar I made for my friend Jan.  Since there are so many pictures, I have only noted the products that are not from PAPERTREY INK.


photo
Soft Pool Shadow Ink, Hero Arts


photo
Worn Lipstick Distress Ink, applied with an AquaPen


photo
Copic Marker - Y21

photo
London Fog Dye Ink-Memento

photo
Rose Bud Dye Ink-Memento
EK Success flower punch, 1/4" hole punch

photo
Sentiment:  Verve Stamps, Let it Shine
Copic Markers

photo
Copic Markers, Sakura Clear Star Pen

photo
"Happy Birthday"-Hero Arts
Versamark Ink, Zing Embossing Powder: Leaf

photo
Patterned Paper:  Basic Grey, Out of Print
Perfect Pearls: Biscotti, Perfect Medium,  Versamark Ink

photo


photo
Distress Inks:  Scattered Straw, Vintage Photo, Gathered Twigs, Shabby Shutters

photo

The December page was actually my submission for a Make-It-Monday #39: Multi-Stamp Background Building and was the starting point for the whole calendar.  It didn't take long for me to figure out that to create a separate page for every month was a bigger undertaking than I anticipated!  It seems that I can make any project more difficult than it needs to be!  None the less, I had a great time making this and I think Jan will enjoy it all year.

Some of you actually asked to see this finished project!  I hope you will enjoy it, too.

Thanks for stopping by,
Suzanne


Friday, December 2, 2011

Make It Monday #43: Ribbon Pleating

Hi there Everyone and hello to December!
I am getting serious now that the page has flipped on the calendar.  Time to get down and inky as we all know the next few weeks will fly by!

Do you ever find that something wonderful occurs in your card making when you least expect it?  I had pretty much given up on entering a project for this Make-It-Monday challenge, I simply was not inspired although I thought it is an excellent way to jazz up a ribbon trim.  So, there was this piece of Hibiscus Burst card stock laying on my desk and I looked up to see a spool of pink and white ribbon that I bought for $1 at Michael's and thought the two matched very well.  So I applied the ribbon per Dawn's Make-It-Monday tutorial and went from there!  The second step (which should have been the first) was to make streaks of white over the card stock using Distress Stain in Picket Fence.  I was already thinking "cute little penguin" so the sentiment from Tremendous Treats: Christmas went down in Memento Tuxedo Black ink.  The four little glittery snowflakes (cut with a Marvy punch on Recollections glittered paper) were also laying around my work table waiting for service so they went on with some 3/16" Glue Dots.  Finally the little penguin was stamped, cut out and the scarf was paper pieced using My Mind's Eye paper ALSO laying out on my work table. (I really do clean up my work space-promise!)  I used Copics to color the penguin and cut a
1 3/4" circle from more white PTI card stock, popped him up on foam adhesive, rounded the upper corners of the pink layer as well as the 4 1/2" X 4"card base, and was done.

And here is my project:


photo

I think I included all of the product details above. Would you please leave a comment and 
tell me what you think of my little pink card? 

I hope you are enjoying the Advent season and the process of making all of the beautiful 
goodies you will share with friends and family in this celebration of giving!

Thanks for stopping by, 
Suzanne